Introduce a regular purchase app in the online store!

Postscript in February 2021:
SHOPIFY released a subscription API in 2020. Go Ride has developed a SHOPIFY sub -school app that supports Japanese full.
See the following article for details about the app.
We have developed the SHOPIFY sub -school app "GO SUBSCRIDE"!
Index
What is Bold Subscriptions?

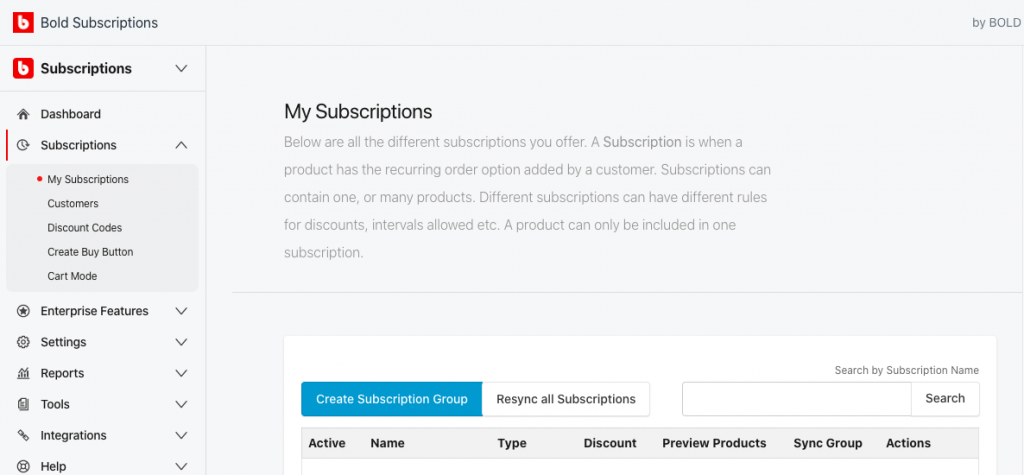
Bold Subscriptions is an application that introduces a regular purchase function (so -called sub -school) on SHOPIFY's own site. In this app, you can set the purchase option of regular purchase or once + regular purchase on the product page. In addition, after you purchase the product, you can adjust the regular purchase period and change your personal information. It contains a variety of complex functions, and I think some people are difficult to understand, and some are not good at English, so I would like to explain easily and clearly here!
BOLD SUBScriptions plan and amount

There are two plans for Bold Subscriptions. The first is the Essentials plan, the second is the Advanced plan. The difference in this plan is that the Advanced Plan has a Build-A-BOX function, and you can put your favorite products in the basket as if you were in a supermarket. In my opinion, the ESSENTIAL plan includes a lot of functions, so I think it's better to try Advanced after getting used to Essential at first. Also, since the fleet -like period is 60 days, get used to the ESSENTIAL plan during the period.
Settlement service settings
After installing the app, first connect the payment service.
[Setting> Payment Gateway> Connect to Stripe]
I recommend Stripe.

Stripe is easy to set up (setup time about 5 minutes), and you can enter the account created by Stripe into Bold Subsctivity and log in.
Points to recommend stripe:
- There is a Japanese version (https://stripe.com/jp)
- Stripe has a high usage rate of Japanese companies, and a reliable payment service that is also hosted by Shopify Payment.
- It has been tested many times with the BOLD app and is recommended by BOLD
- Initial cost, no monthly fixed cost
In addition, if you scroll, there are other payment services that can be used, so please take a look.

Install on the theme
Next, install the app on the theme.
[Help> Install to Theme]
If you don't know much about the functions yet, install the Automatic Install (Free) in the middle. Click on Start Automatic Install to select the theme from the theme list used on your own site, and the app is automatically introduced.
Let's actually set a regular purchase!
Proceed to the setting of regular purchases.
[Subscriptions> My Subscriptions> Create Subscription Group]
Step 1: Select a regular purchase type

- Internal Subscription Name: Determine the name of the product group to make it easier to manage (this name is not visible to you)
-
Subscription Type: Select Standard or Convertible.
- Standard is a regular regular purchase (it will be purchased from the time of purchase).
- Convertible is a specific product (even a separate product is also possible) and will be set for subscriptions next time. For example, once you buy a matcha pack once, you can purchase a regular purchase of Hojicha at a discount. The good thing about Convertible is that you can try various kinds of products to increase the possibility of subscribing to the product in the future.
Step 2: Select a product that can be used in the regular purchase group

- The products in each group have the same regular purchase. In short, instead of one package of various types of products, set up a product group that is determined to make it easier for the store to manage, and put a product that applies to that setting, and reflects it on the site. increase. * If you want to set it with a set product, please create a set product as one product in Shopify Products.
- Allow Swapping of Products: If you select this option, you can switch to other products on the way. Other products will be in the same regular purchase group. The switching is set on your account page.
Step 3: Configuration of interval

Here, we will set what -to each time the product will ship to the customer ( * This is not the period)
-
LET CUSTOMER SELECT ORDER INTERVAL: Customers will choose the interval
- Select every day, every week, every week, every month, every year, and set the MAX number. (Example: [9] and [WEEK] If you set it, you can choose the delivery interval every week.)
- If you select, the billing date will come out from below.

-
-
- On Purchase Date Each Week: Request every time every time you purchase.
- Charge All Customers on the Same Day (S) Every Week: Options to set in advance (for example, if you set with Week, request on Monday)
-
- Set a Fixed Order Interval: Set the interval in advance (eg, every 3 months = 3 months)

-
- * Select the billing date only when set in Week and Month: On Purchase Date Each Week, Charge All Customers on the Same Day Every Mont (in the case of Week, the day of the week is displayed, so select a day of the week) 。
- Buffer Days: You can prevent the initial date from getting closer to the fixed claim date.

Step 4: Select how to purchase the product

- Select whether the product is an option only for subscriptions, or a regular purchase and once a purchase method.
Step 5: Set the period and cancellation option

- No Limit: Eternal (no period)
-
Set Max Number of Recuring Orders To: Set the options for the time you can choose (eg, [3] = Ended regularly with three orders).
- Add ONGOING OPTION: If you want to add an option without a period
- Allow Customer to PREPAY for Subscriptions: Additional if you want to make a pre -payment option
- Cancellation condition for regular purchase: OFF or ~ Set whether to cancel by order

Step 6: Discount settings

- No Discount: No discount
- Offer The Same Discount on All Orders: Make the same discount for all subscriptions
- Offer Different Discounts On Initial and Recurring Orders: Set a separate discount for the first order and the next order.
Step 7: Save
- Be sure to press the light blue save button. The setting of the regular purchase group is now complete!
Impressions about apps

I think the Bold Subscription app is a bit difficult at first because there are so many functions and settings that can't be explained on one blog. However, on the contrary, there are various functions such as purchase method, regular purchase account settings, regular purchase Email settings, and discount settings, so it is fun to be able to get used to the app. The live chat of the BOLD support center will also support you, so you can use the app with confidence. Also, I thought that this app was not enough, the automatic language change function. Language changes are possible, but it is necessary to enter Japanese in English phrases, so it takes time and there are places that require considerable ingenuity due to the characteristics of English and Japanese. I think that it can be introduced as soon as possible by asking an expert who has already introduced the app and is familiar with the translation.
It's difficult and I don't know; (
If you really want to install the app or install it, but you have a lot of functions and settings, please contact us Go Ride Republic! It will be easy to understand and easy to understand from the settings of the app, so if you need a help without giving up, please contact us! !


