


[2023 latest] Explain how to start the B2B function in SHOPIFY! [SHOPIFY PLUS]
皆さんはShopifyでB2B機能を利用されていますか?
以前はアプリを使用して、企業アカウントとB2B用の価格を設定するなどして運用を行なっていました。
しかし現在は、ShopifyのデフォルトでもB2Bの機能が追加されており、アプリなしでの利用ができるようになっています。
今回はこのB2B機能について紹介していきます。
B2Bをこれから始められる方も、別のプラットフォームからの以降を考えられている方もぜひ参考にしてみてください!
選べる2つの形式
Shopifyでは、ブレンド型と専用ストア型の2つの形式でB2Bを利用できます。
-
ブレンド型
- 1つのストアでD2CとB2Bを運用
- データの一元化により運用効率UP
- 在庫も一元化される
-
専用ストア型
- B2B専用ストア
- B2Bに向けたストアフロント
- D2Cとの在庫を分けることが可能
- データもストアごとに別で保持
どちらのタイプでB2Bを利用するかを自由に選択できるため、自身のストアにあった形式の選択が可能です。
B2B設定
B2Bの設定項目として大きく分けて下記の3つあります。
- 企業
- 個人
- 価格
詳しく見ていきましょう。
企業
B2Bの買い手となる企業を設定します。
管理画面の「顧客管理」→「会社」から、B2B販売を行う企業を追加します。
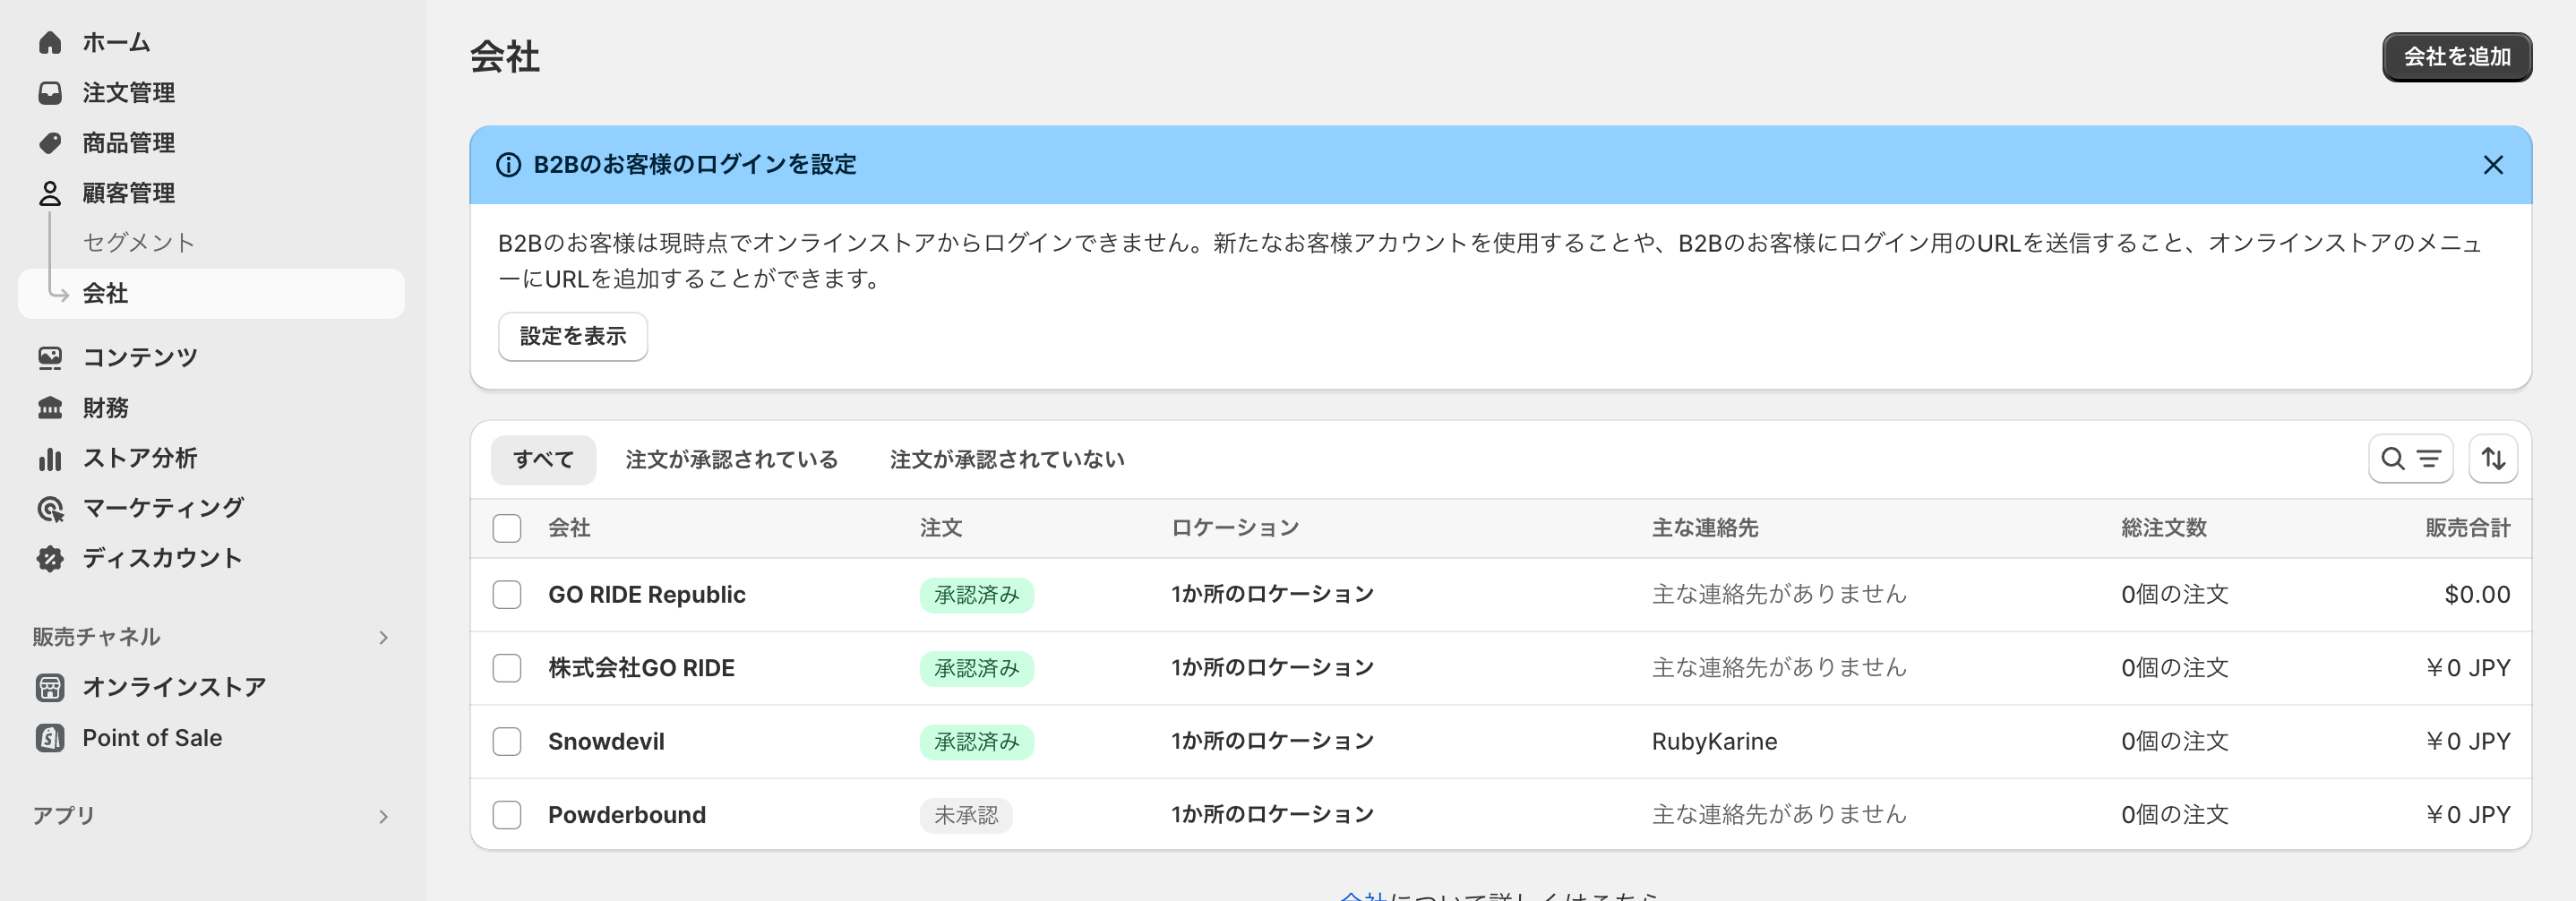
右上の「会社を追加」から、会社名、配送先住所、決済のタイミングなどの設定を行います。
「主な連絡先」「カタログ」はこの後の個人と価格の設定に関わってくるのでまだそちらを作成していない場合は無視して問題ありません。
個人
続いて個人、つまりログインする人のメールアドレスと名前、どの企業に属するのかというのを設定します。
「顧客管理」もしくは、ECサイトの新規会員登録の画面から登録できます。
管理画面から設定する項目として、個人のアカウントと企業を結びつけることが必要になります。
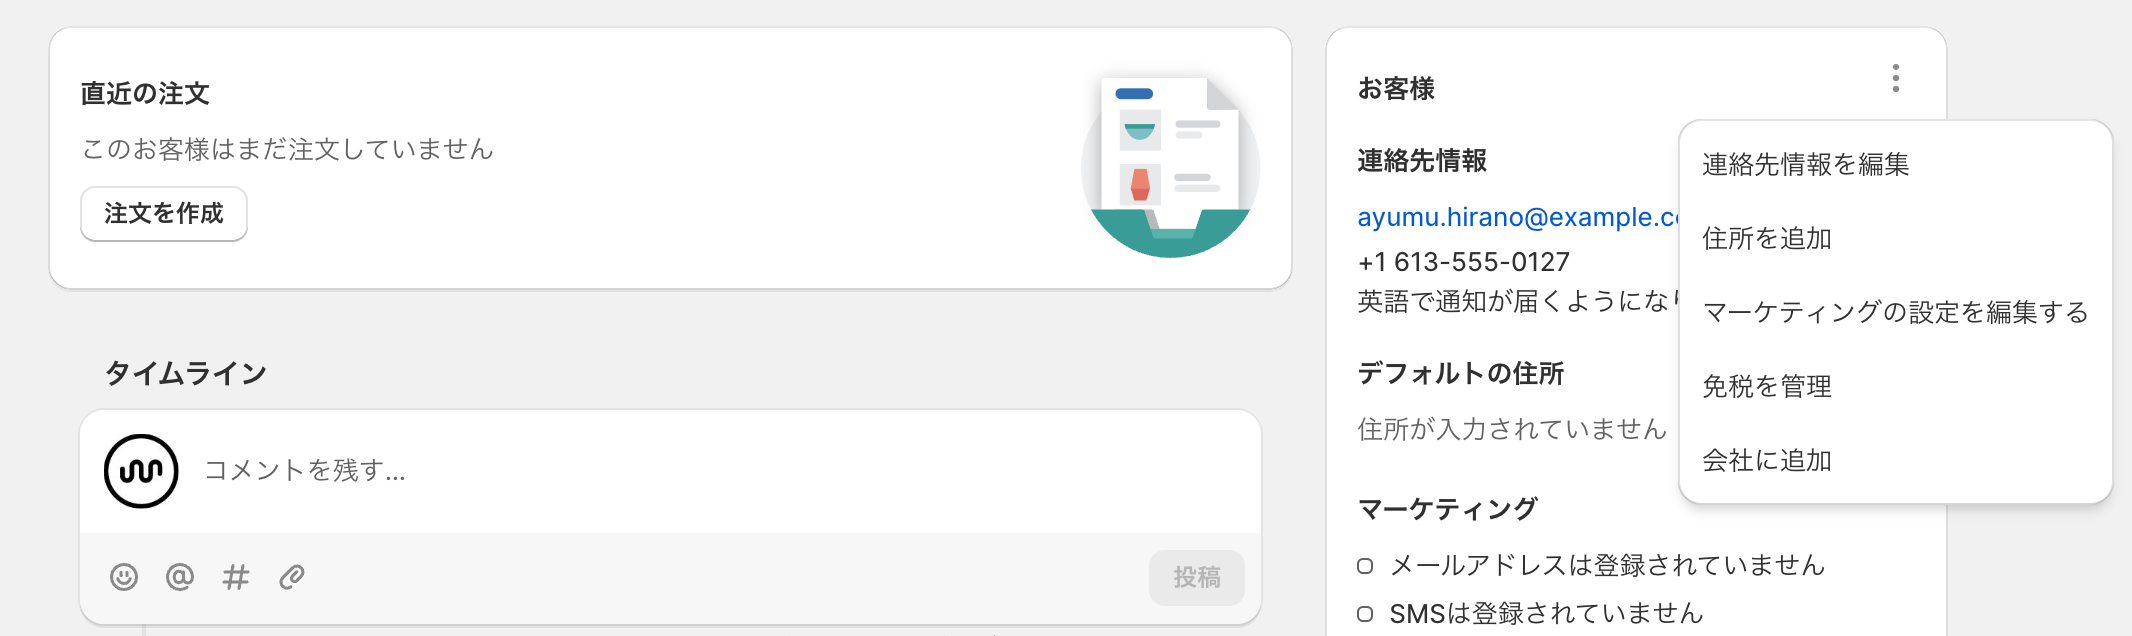
個人のアカウントの設定の画面から
右側の三点リーダーから「会社を追加」を選択すると紐づけることができます。
価格
最後に価格の設定を行います。
「商品管理」→「カタログ」から設定できます。
カタログの作成は「全商品に対して割引を行う場合」と「特定の商品のみに割引を行う場合」の2パターン作成可能です。
全商品に対して行う場合は一律で割引率の設定が可能です。(全商品10%OFFなど)
最後にカタログに会社を割り当てます。
「会社のロケーションを管理する」からこのカタログの割引を割り当てる会社を選択します。
これでB2Bの準備は完了です!
これで、企業、個人、価格が全て結びついたことになります。
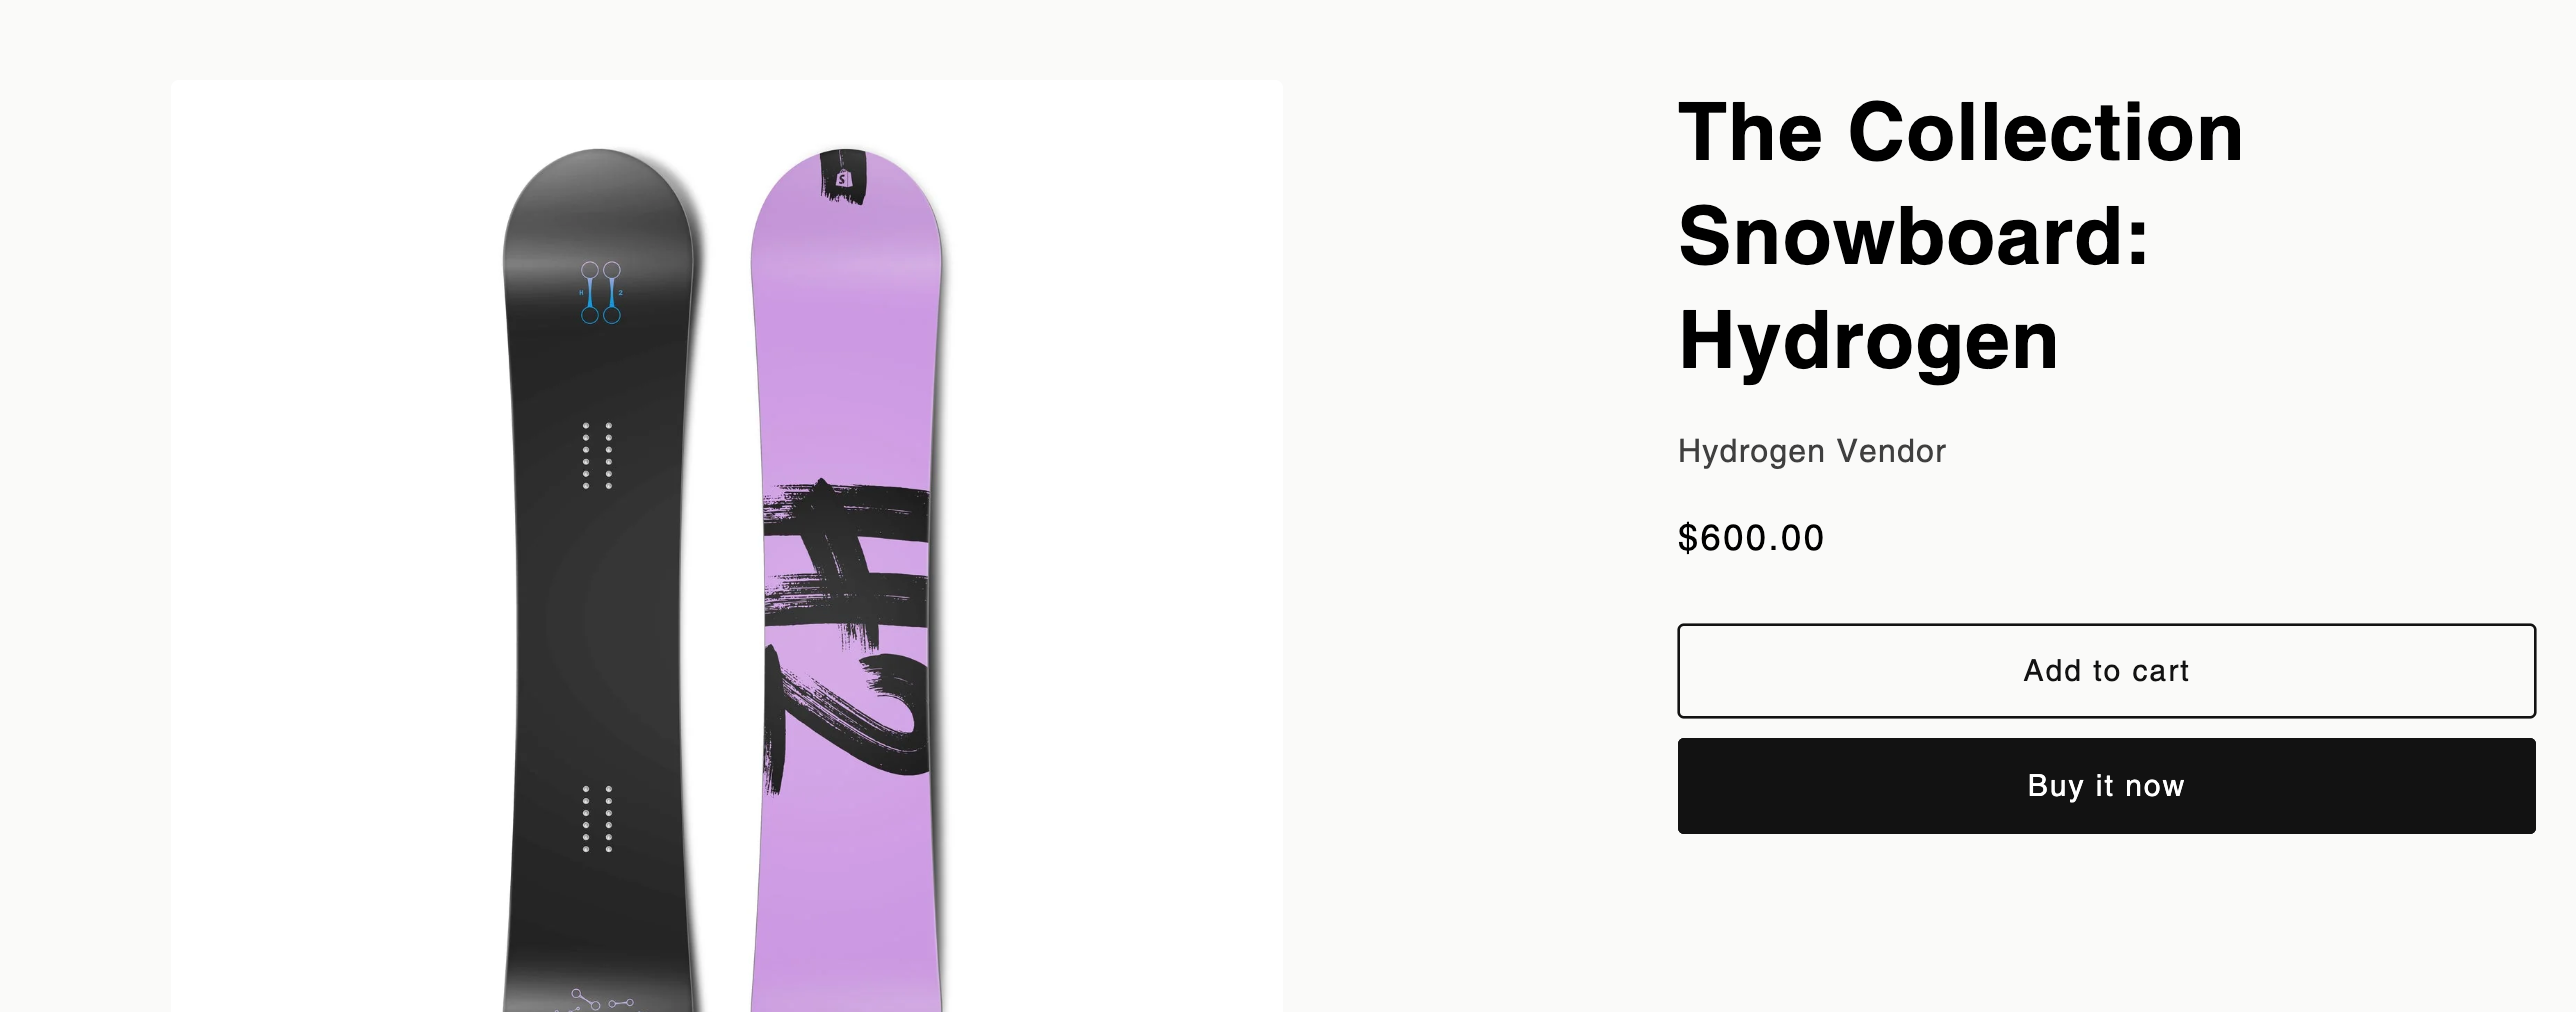
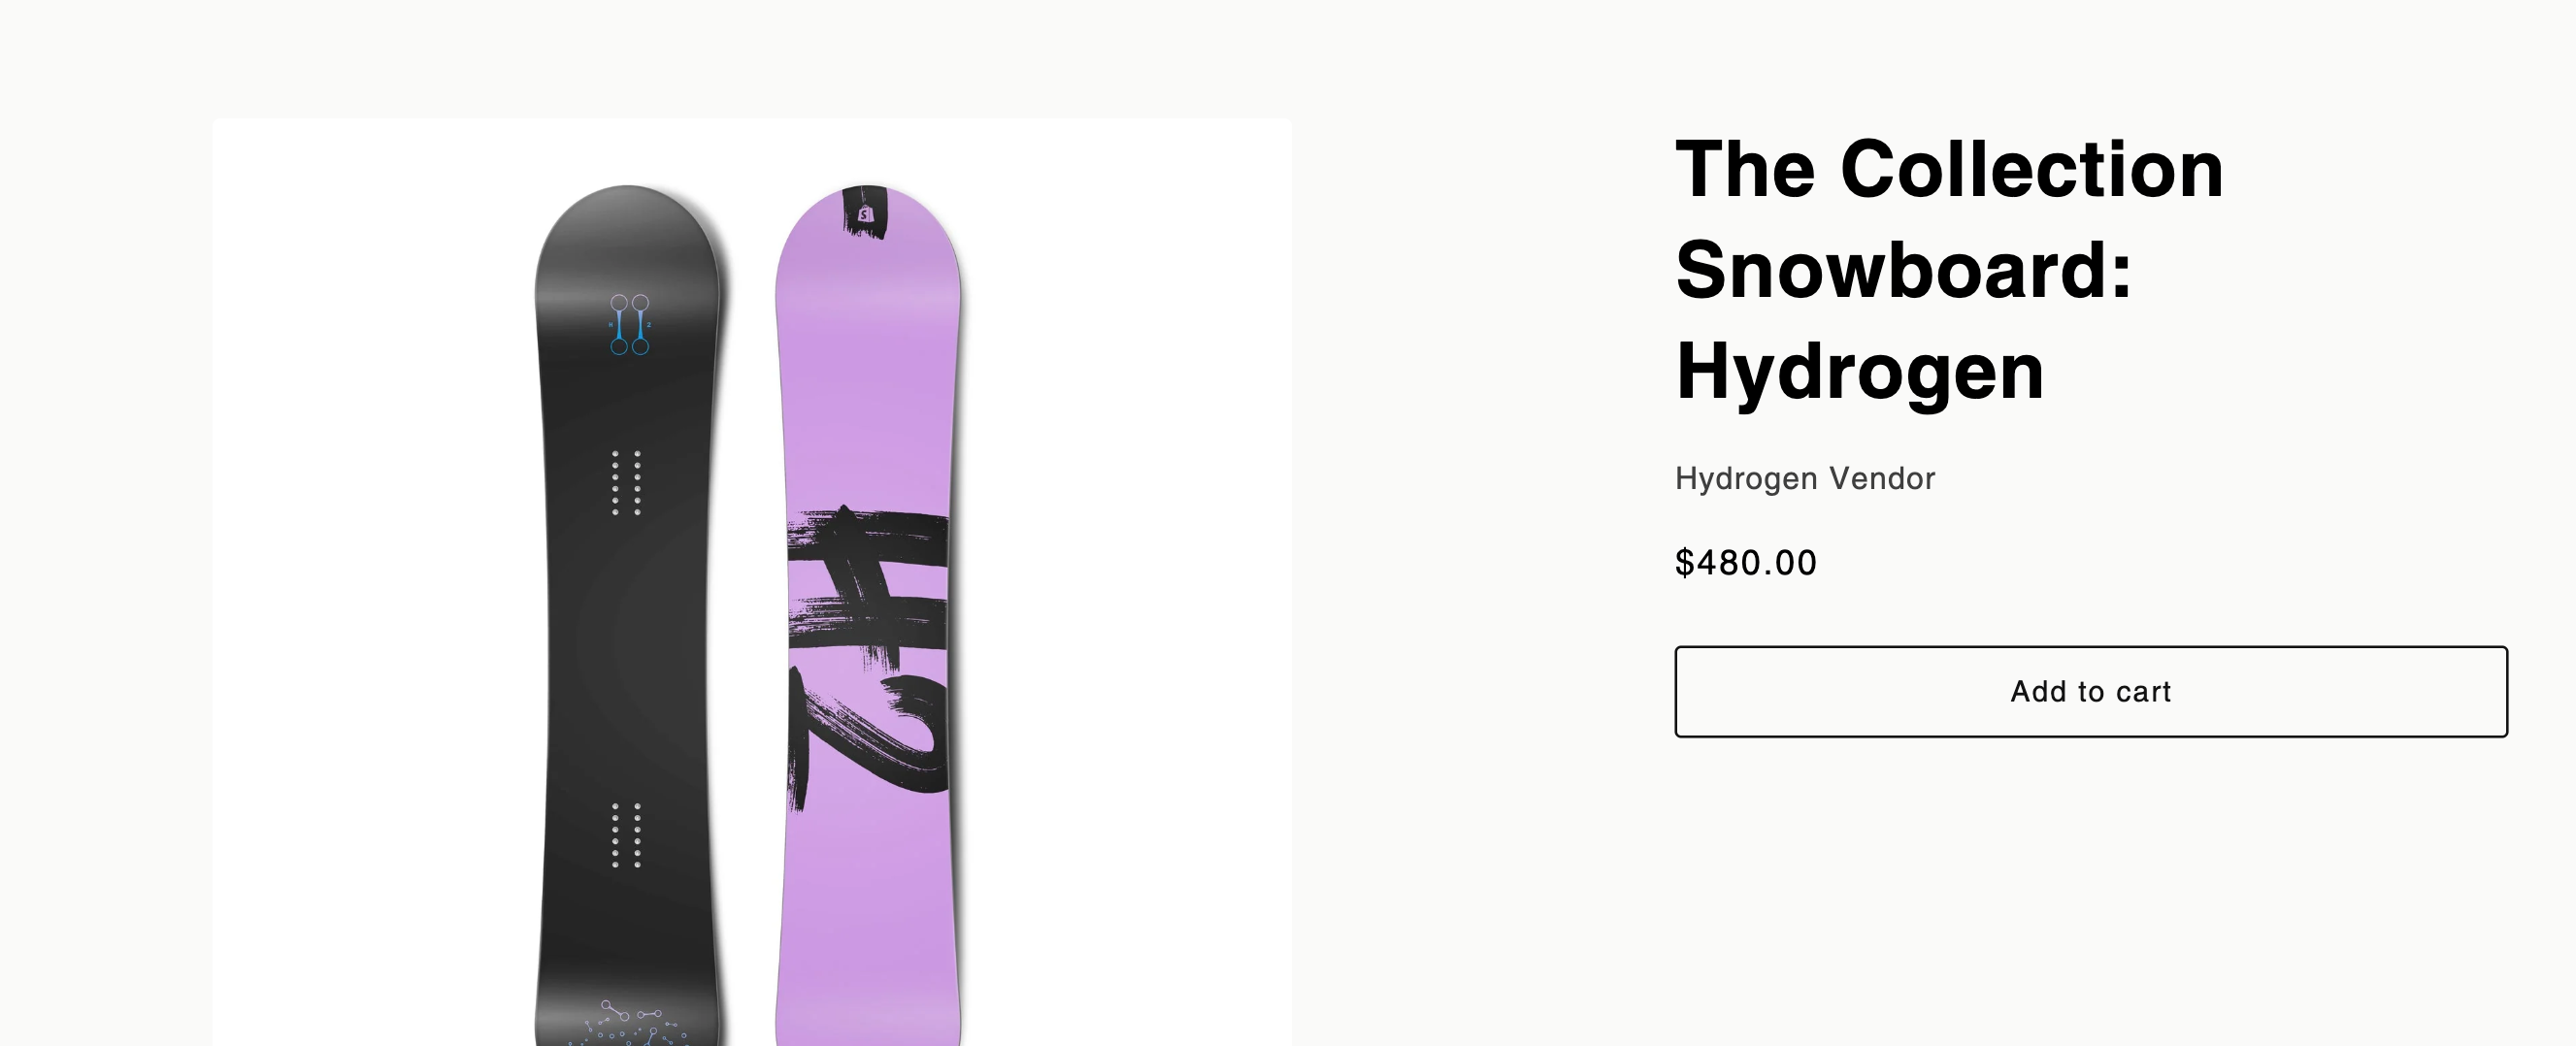
会社が設定されたアカウントでログインしたときに、
商品価格が割り当てられたカタログの割引率が適用された価格が表示されるようになります。
ログイン前
ログイン後
Shopify Plus限定機能
Shopify Plusを利用中のストアでは、
通常のストアよりも多くのB2B機能を利用することができます。
- 数量ルール
- B2B用サインアップフォーム
- Quick Order リスト
- B2B専用フロント
- 企業ごとのFlow
- B2Bスタッフアカウント
この中でも特に、数量ルールの設定は、B2Bにおいては重要な設定になるので、ぜひ覚えておきましょう。
先ほどの価格設定の画面から数量ルールの設定が可能になります。
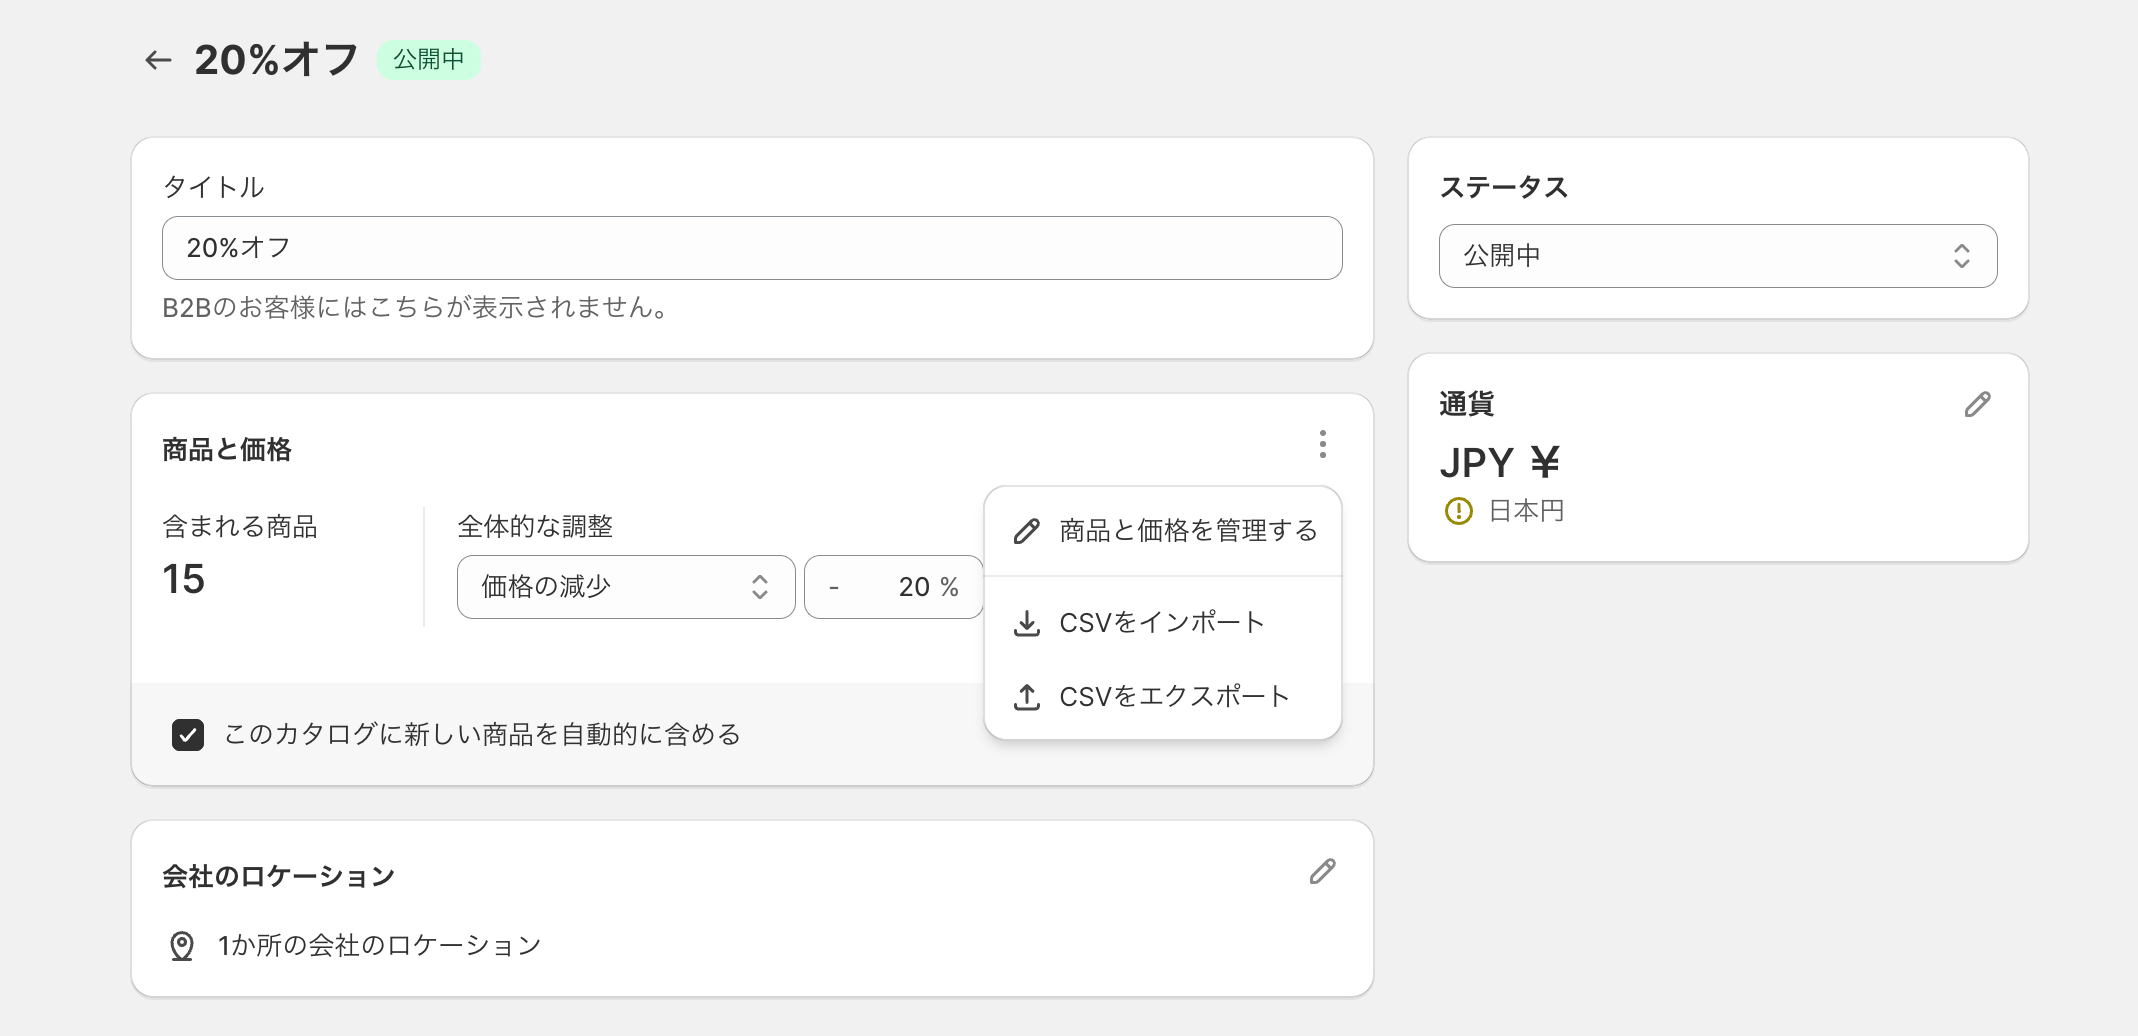
「商品と価格を管理する」から細かい設定の画面に飛びます。
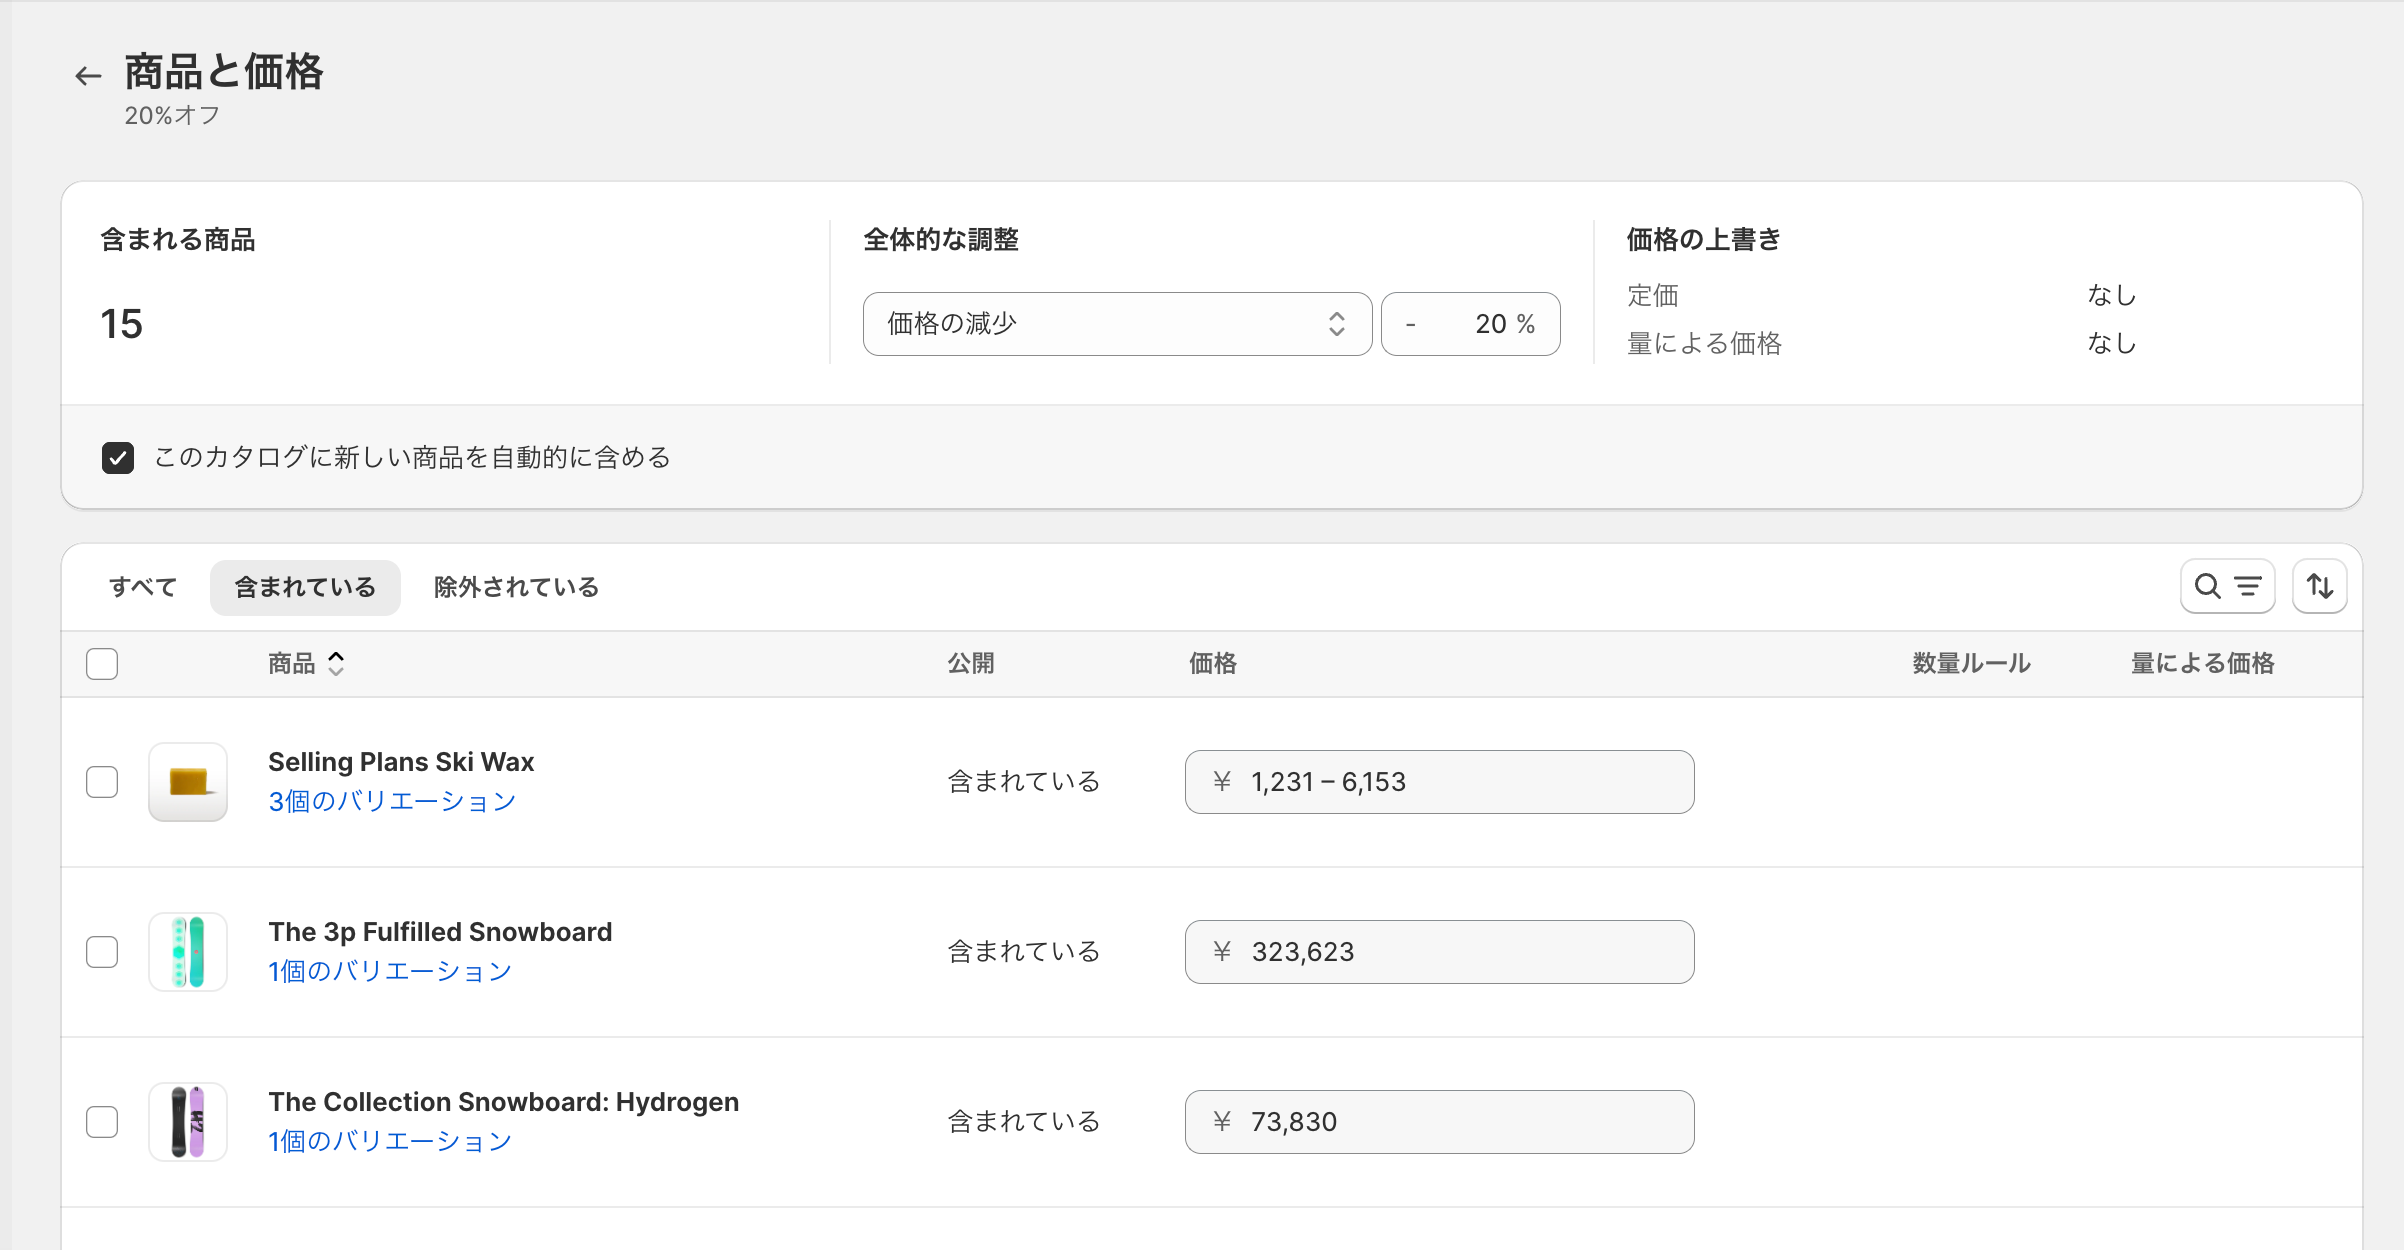
こちらの画面から「数量ルール」「量による価格」が設定できます。
数量ルール:購入の最大数、最小数、増分(ロット)
量による価格:まとめて購入した際の割引後金額
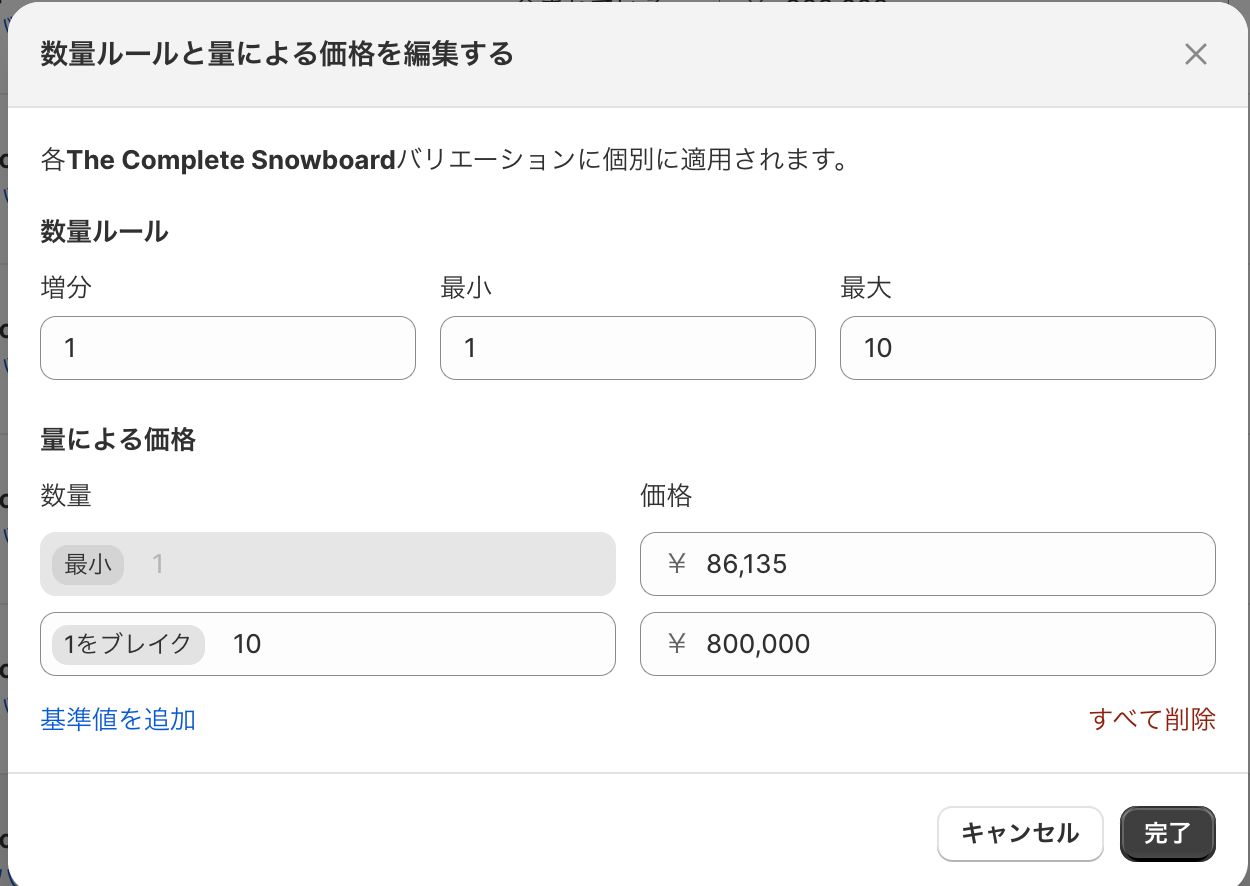
こちらで、各商品ごとに購入数量のルールを決めることができるので、商品に合わせた設定を行いましょう!
Shopify B2Bにおける決済
B2Bのストアでは、通常の決済に加えて
NP掛け払い、Paidの利用が可能になっています。
それぞれのB2Bに合わせた決済方法を利用しましょう!
いかがでしたでしょうか?
近年はB2BをECサイトで完結させたい方も多いのではないでしょうか。
近年ShopifyはB2Bの機能の充実に力をかなり入れているので、今後も機能のアップデートが期待されます!
ぜひこのタイミングで、ShopifyのB2B機能お試しください!


Popular articles


![[GO SUB introduction example] Makes it easier to continue your daily skin care routine. Convenient regular flights made possible by ReU](http://goriderep.com/cdn/shop/articles/regional-settings-and-more..._7ce3e0fd-39ca-4b2f-a3f9-73c622998c9d.jpg?v=1792041132&width=600)


