Thorough explanation of Product Type, Vendor, and TAG for SHOPIFY product registration!
Product type、Vendor、Tag
Product type(プロダクトタイプ)、Vendor(ベンダー)、Tag(タグ)は商品の整理に使用できるラベルです。 商品毎にこの情報を追加すると、コレクションページの作成、コレクションページでの商品ソート(並べ替え)の迅速化に役立ちます。Product type
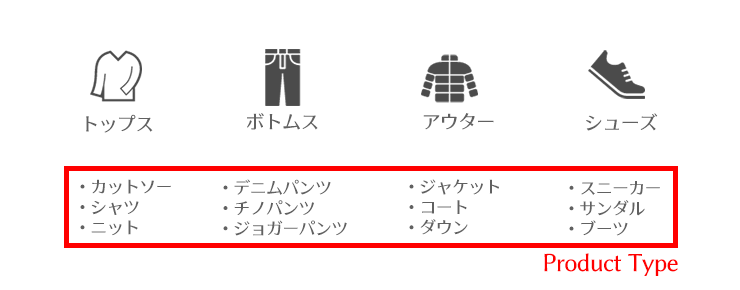
商品カテゴリーの事です。(楽天市場においてのカテゴリーと同義) 商品の整理やコレクションページ(カテゴリーページ)の作成に役立てることができます。 一つの商品につき一つのProduct typeしか設定できません。 Product typeの入力例としては、アパレルの場合はシャツ、ボトムス、アクセサリーなどの商品カテゴリーがあります。 Product typeはコレクションページの条件指定や管理画面においての製品内絞り込みに使用することができます。Vendor
商品を製造している製造元または卸売業者を入力します。 Vendorの入力例としては、製造業者、メーカー名やブランド名などがあります。 コレクションページの条件指定や管理画面においての製品内絞り込みに使用することができます。 Product typeと同様に一つのVendorしか設定できません。Tag
タグは一般的にProduct typeよりも具体的であり、商品に検索可能なキーワードを追加するために使用できます。 3つの中で一番柔軟性のあるラベルになります。他のラベルと違い1つの商品に複数のTagを設定する事ができます。 Tagの入力例としてはアパレルの場合カラー、長袖・半袖などのスタイル情報などがありますが、製品の形容にかからわらずシーズンや特集などのカテゴライズにも利用できます。 コレクションページの条件指定や使用するテーマによってはコレクションページでの商品ソート(並べ替え)に使用することができます。設定方法


Product type、Tag振り分け例
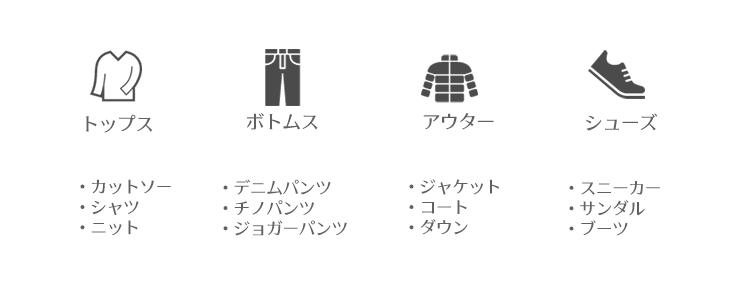
Vendorはいいとして、Product typeとTagの使い分けをどうするかが悩むポイントになります。 今回は以下の様なアパレルを扱うストアの場合を例にあげて振り分け方法をご紹介いたします。
①大カテゴリーをProduct typeで登録し、小カテゴリーはTagで登録する
 ・大カテゴリー(例:トップス)のコレクションページを作る場合は表示条件を「Product typeがトップスの商品」と指定します。
・小カテゴリー(例:デニムパンツ)のコレクションページを作る場合は表示条件を「Tagがデニムパンツの商品」と指定します。
②小カテゴリーを全てProduct typeで登録する
 ・大カテゴリー(例:トップス)のコレクションページを作る場合は表示条件を「Product typeがカットソーの商品・シャツの商品・ニットの商品」と下層のカテゴリーを全て指定します。
・小カテゴリー(例:デニムパンツ)のコレクションページを作る場合は表示条件を「Product typeがデニムパンツの商品」と指定します。
ここで紹介した方法以外でも自分が管理しやすい方法で振り分けしましょう。
Tagの一括登録・削除・置換に便利なアプリ
いろいろ設定したものの、後から「このタグを複数の商品に追加したい!」、「やっぱりこのタグに置き換えたい!」なんてこともあるかと思います。 そんな時にはこちらのアプリが便利。 Power Tools - Bulk Edit Tags 通常タグを一括追加・削除するには、CSVエクスポートして商品情報を修正して改めてインポートする必要があります。 こちらのアプリを使えば無料で全ての商品から1つまたは複数のタグを簡単に追加・削除・さらに置換できます。 後から一括変更も可能という事で商品登録時に神経質にならずに済みますね。GO RIDEではShopifyでECサイト制作・運用を行っております。 是非お気軽にお問い合わせください。 お問い合わせ・取材依頼はHereから


