Explains how to link SHOPIFY and GitHub!
By using Shopify and GitHub integration, you can use Git to change the theme code and track. This tutorial describes how to install the SHOPIFY GITHUB application, how to connect with a brunch, how to test the connection, and how to publish theme.
Before the start
Before using the integration of Shopify and GitHub, do the following steps:
If you want to use a development store for building a theme, create or log in to create a SHOPIFY partner account and create a development store.
You need an account with the authority to "manage the theme" or the "theme" authority of the store you want to do. Or you need to be the owner of the store.
Check the GitHub repository and branches you want to connect. Branches must match the default Shopify theme folder structure. You cannot create a repository or branch from the SHOPIFY management screen.
If there is no theme yet, consider initializing it with SHOPIFY CLI.
If you want to use a theme from an existing store, you can download the theme ZIP file and create a repository using its contents.
If the repository belongs to an organization that does not have the authority to install the app, you must ask the administrator to approve the installation before connecting the theme. You can also ask the administrator to install the app for the organization.
Step 1: Connect to GitHub organization or account
To start the integration of Shopify and GitHub, you must first connect the GitHub organization or account to SHOPIFY.
If you are using a new development store, you will not be able to configure the integration with GitHub when you log in immediately after the store is created. To connect to GitHub, you need to log in from the store and then log in again via the partnet dashboard.
Note: In GitHub tissue with SSO enabled, an active SAML session is required before connecting an organization.
From the SHOPIFY management screen, move to the "online store"> "theme".
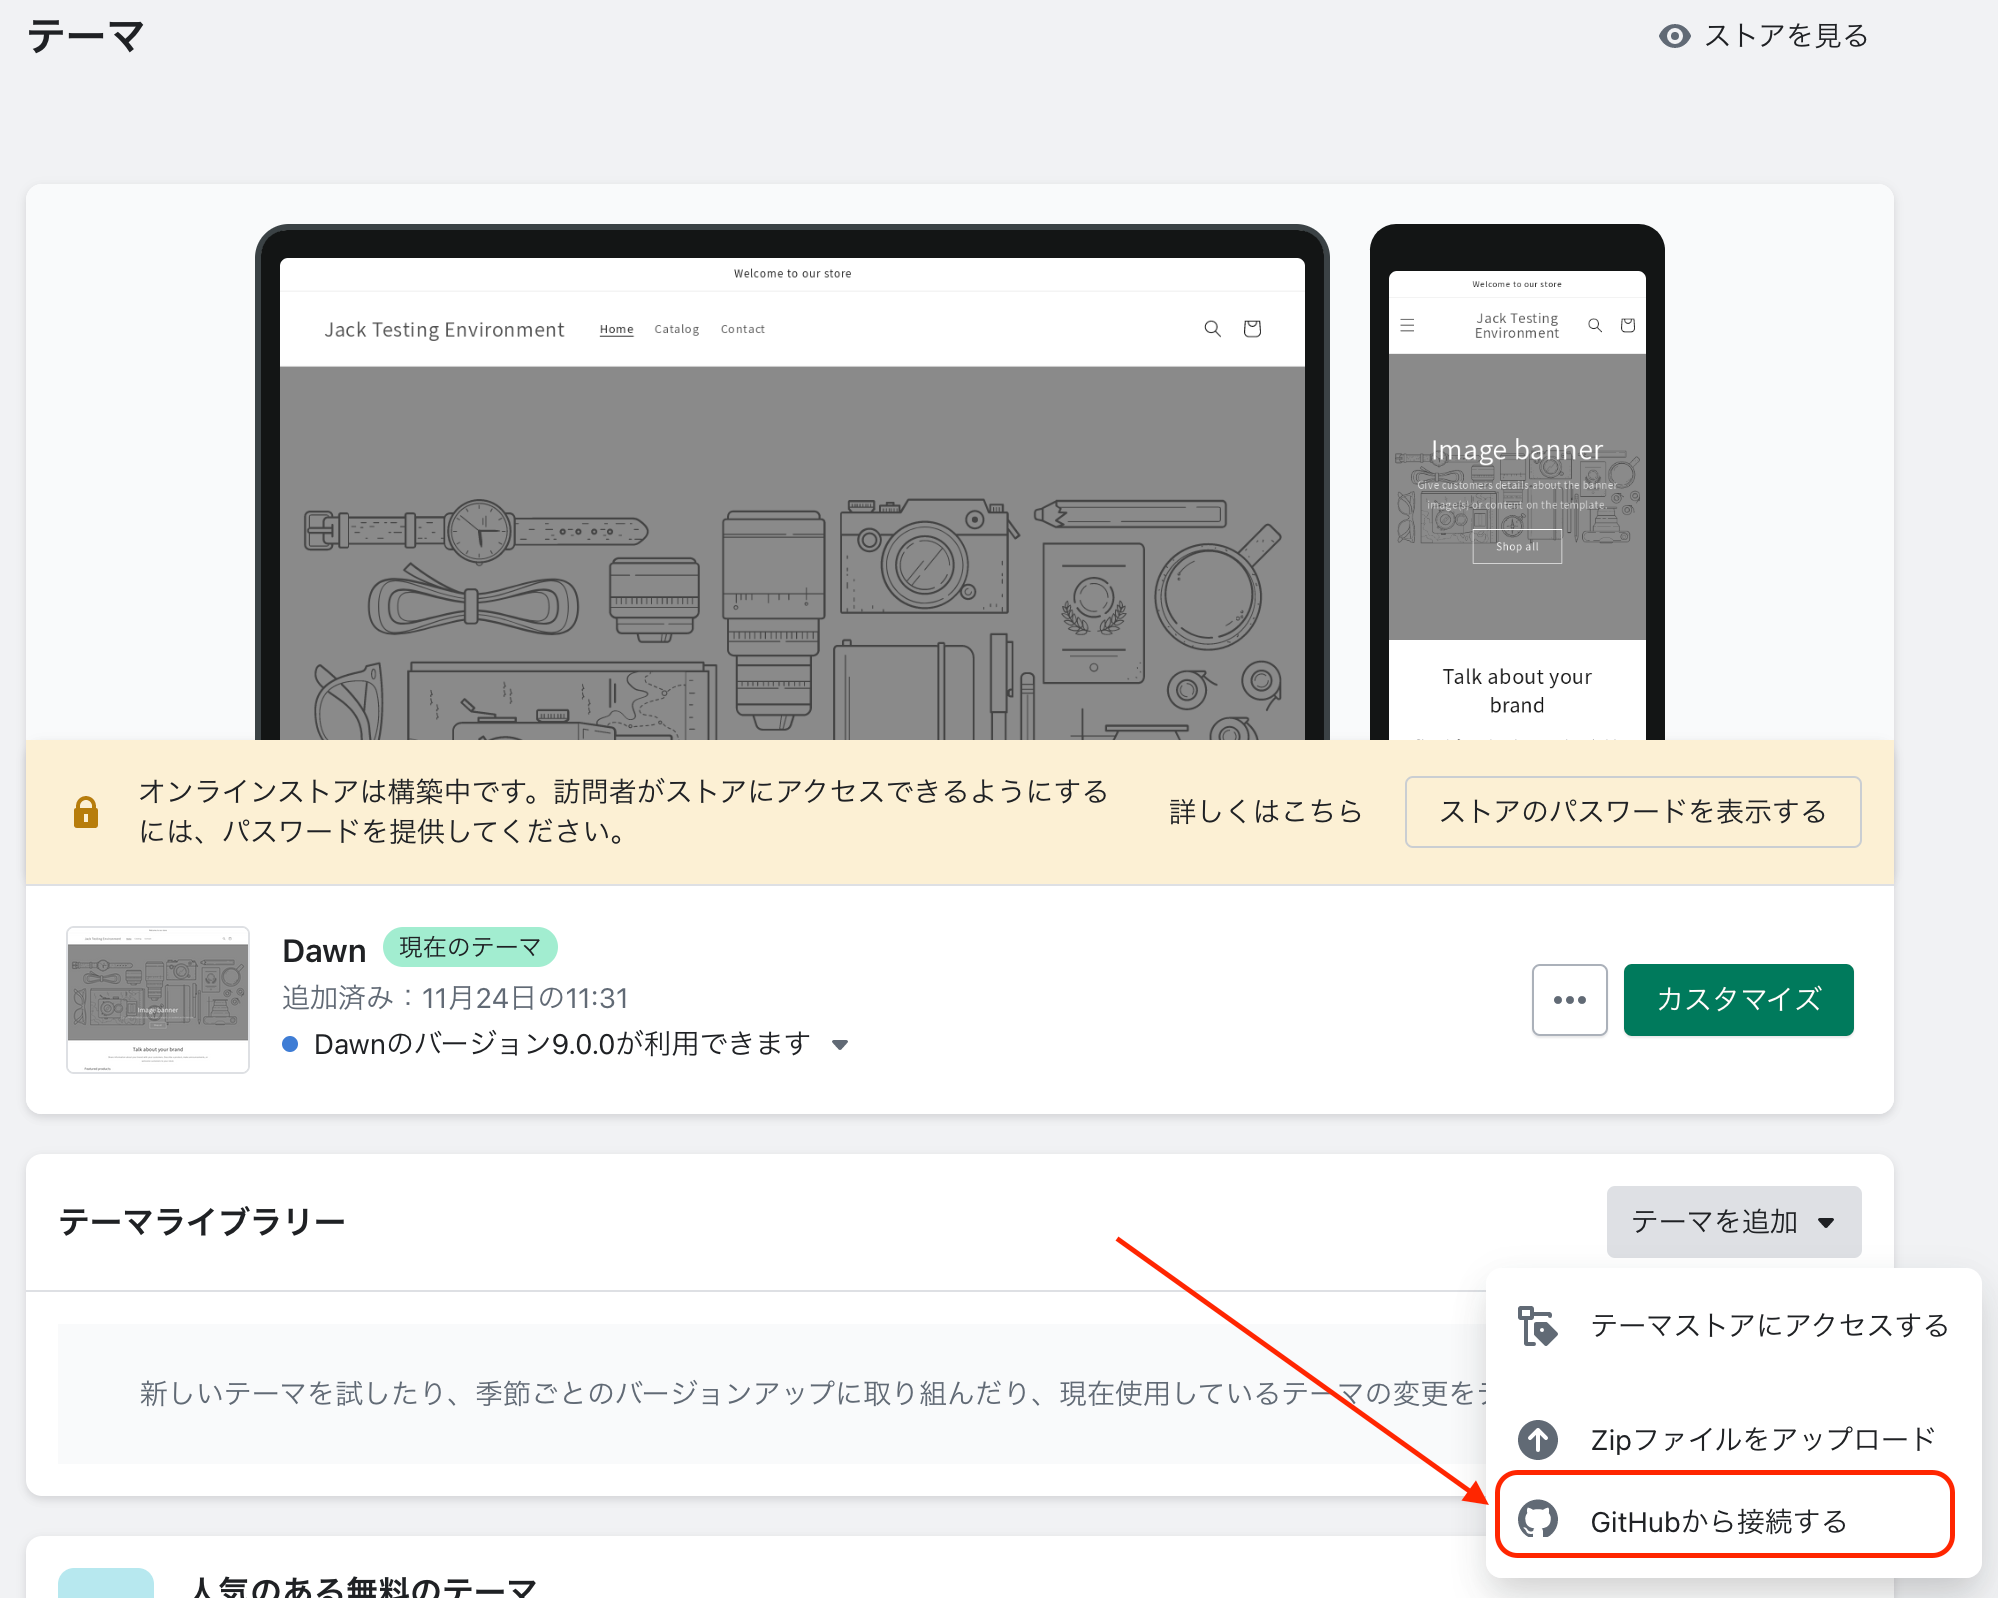
In the theme library section, click "Add a theme"> "Connect from GitHub".
From "Connect the theme", click "Login to GitHub".
Enter GitHub authentication information.
You will be asked to authenticate and install the SHOPIFY GITHUB app. Select whether to install the app in your personal account or to install it for your organization.
To install an app for an organization, install the app for all repositories or select a specific repository. SHOPIFY recommends that you only allow access to specific repositories you want to use this integration.
Tip: You can connect the additional account and the organization by repeating the same step and selecting "Addition".
Step 2: Connect the brunch as the theme
To connect a brunch to the theme of the SHOPIFY management screen, you need to select a brunch. The contents of the selected brunch will be added to the theme library as a new theme.
Brunches of 50MB or more cannot be connected to SHOPIFY.
From the SHOPIFY management screen, move to the "online store"> "theme".
In the theme library section, click "Add a theme"> "Connect from GitHub".

If you connect a repository owned by the organization, select the organization to which the repository belongs.
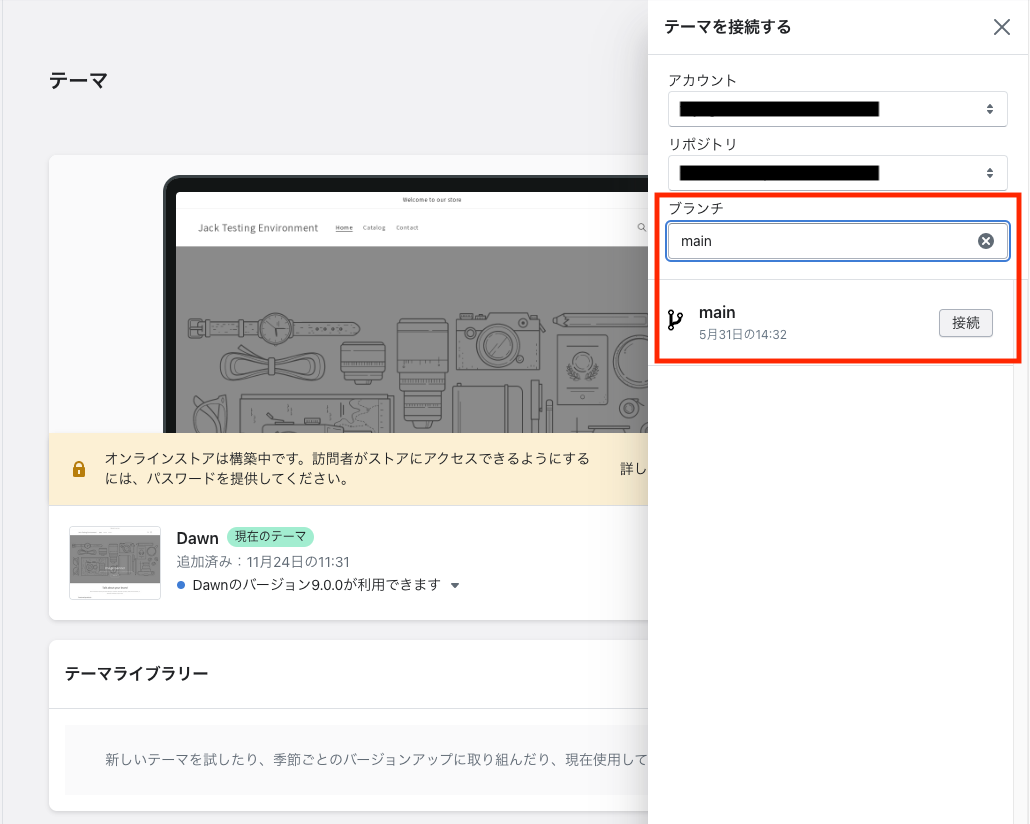
Select the repository you want to connect and select the brunch you want to connect.

The theme is displayed in the theme library. The theme connected to GitHub displays the repository, branch name, and last commit time on the theme card.
After the first connection is completed, all commits to the selected branch are pulled on the theme, and all changes performed from the SHOPIFY management screen are pushed to the brunch.
Step 3: Test the connection
In order to make sure that the connection between the brunch and the repository is working properly, you can make a small change to the theme and confirm that the brunch has been committed.
From the SHOPIFY management screen, move to the "online store"> "theme".
Click the theme connected to GitHub and click Customize.
Change any settings for the theme. For example, DAWN recommends small changes, such as changing the announcement bar textbook.
Click "Save" to end the theme editor.
In the theme library, click the brunch name on the theme card and move to GitHub.
Check the latest commit. A commit to Shopify Bot should be listed.
If necessary, you can also push a change from a local machine to a brunch. If you push a commit to the brunch, the theme "Final Save Date" will be updated, and changes will be displayed on the theme.
summary
In this tutorial, I explained in detail about the integration of Shopify and GitHub. With this integration, developers can easily track code changes and effectively manage theme versions.


